DIY Kids Easter Hats Ideas for School
Looking for fun and easy DIY kids Easter hat ideas for school? Discover step-by-step tips, creative hat inspiration, and free planning resources to make your Easter Hat Parade a success!
At the end of Term 1 each year, our Kindergarten and Year 1 classes have one of our favourite traditions - the School Easter Hat Parade!
The children plan and create their own hats, and although the process can get quite messy and a bit chaotic (especially when the hot glue gun makes an appearance), it’s a highlight of the term that my students and I look forward to every year.
Seeing each child proudly parade around the hall in their one-of-a-kind masterpiece is such a joy. Their faces light up with pride and excitement, knowing they’ve created something special.
Parents and grandparents gather in droves, sitting around the edge of the hall, clapping and waving as their little ones march past.
But let’s be real - managing an entire class of young children designing, building, and finishing their hats on time can feel overwhelming!!
There’s glue everywhere, some hats don’t quite stay on little heads, and there’s always that last-minute rush to get everything parade-ready!
Finding ways to keep the process fun and organised while ensuring students can work as independently as possible is the secret to a smooth lead-up to the big day.
Now for the good news -
Don't leave it till the last minute! With a little planning, the right resources, and a structured approach, you can make your Easter hat decorating a stress-free, engaging activity that promotes creativity, fine motor skills, and student independence – AND have every hat ready in time for the big event!

Why Make Easter Hats in the Classroom?
Easter hat making is a fun end-of-term activity and it’s also an incredible learning experience for young children. It is one of our favourite Easter crafts.
While your students are busy cutting, gluing, and decorating, they’re also developing important skills that support their learning in meaningful ways.
1. Encourages Creativity and Independent Decision-Making
When students design their own Easter hats, they get to express their unique ideas and make independent choices about colours, materials, and decorations. This open-ended creativity builds confidence and helps young children learn that there’s no right or wrong way to create.
Whether they want a bunny-themed hat, a springtime garden, or a nest of Easter eggs balanced on their head, the process is entirely theirs to own.
2. Develops Fine Motor Skills and Problem-Solving
From cutting paper and threading ribbons to arranging and gluing decorations, making an Easter hat is a fantastic fine motor workout. Young children need lots of opportunities to strengthen their hand muscles for writing, and hands-on projects like this are perfect for building those skills.
At the same time, hat-making presents challenges to solve.
How will they attach the ears so they stand up?
What can they do if their hat keeps slipping off?
Learning to think creatively and adapt their ideas builds problem-solving skills that they’ll use across all areas of learning.
3. Fosters Pride and a Sense of Accomplishment
There’s something incredibly special about watching a child beam with pride as they parade their handmade hat in front of an audience. They’ve put in the time, effort, and creativity to make something uniquely their own, and that sense of accomplishment and ownership is invaluable.
When children see their ideas come to life and receive positive feedback, it reinforces their confidence and motivation to create.
4. Builds Community and Connection
Our school Easter Hat Parade is a whole school community event.
Parents, grandparents, and teachers come together to celebrate the children’s creativity. It’s a beautiful way to connect families with the school and create lasting memories.
The students also love seeing their friends’ creations, sharing ideas, and supporting each other. It’s such a valuable lesson in collaboration and appreciation for others’ work.
How to Make an Easter Hat
Making Easter hats in the classroom is a fun and creative process, but it can quickly become a teacher’s nightmare. Over the years I have refined our process and now have a clear step-by-step plan to keep things organised.
Follow this plan and you will be having sweet dreams – no more nightmares!!
We usually start preparing for our Easter Hat Parade in Week 8, giving us nearly two weeks to design, construct, and complete a full class load of hats before the big day.
The whole process is broken down into clear steps, ensuring that students can work independently and successfully while still having plenty of fun!
My process follows these key steps:
Brainstorming Ideas – Students explore different hat designs from around the web, discuss their ideas with a partner, and refine their plans.
Planning the Hat Design – Each student sketches their hat idea on a planning sheet, carefully choosing colours, decorations, and materials.
Gathering Materials & Setting Up – I organise and prepare the classroom with the necessary supplies, making it easy for my students to work independently.
Making the Hats – Over several days, the kids construct their Easter hats in an investigation-style workspace, problem-solving as they bring their designs to life.
The Easter Hat Parade! – Students proudly showcase their unique creations in a celebratory parade for families and the school community.
Each step builds on the last, ensuring that students take ownership of their creations while developing creativity, fine motor skills, and confidence.
I love how unique their hats are and the way they each add their personal touch.
Coming up in the next sections of this blog post, I'll break down each step in more detail and give you tips, strategies, and some free resources to make Easter hat making a smooth and enjoyable experience in your classroom.
Step 1: Brainstorming Easter Hat Ideas
Before students put pencil to paper, it’s important to spark their creativity and help them refine their ideas. This step ensures they feel confident about their designs and that their hats will be practical, achievable, and uniquely their own.
Using Visual Inspiration to Get Started
We begin by discussing what students can expect from the process, explaining that they will be designing and independently making their very own hat.
To get their creativity flowing, we watch my Easter Hat Inspiration PowerPoint, which features 36 slides of creative hat ideas sourced from all over the web.
This PowerPoint always results in plenty of “oohs” and “aahs” as students spot fun ideas they love. It builds excitement and momentum, helping them start to visualise what their own Easter hat might look like.
💡 Want to inspire your students?
You can download my FREE Easter Hat Inspiration PowerPoint from my Resource Library to make brainstorming fun and easy!

Quiet Thinking Time & Peer Discussion
After watching the PowerPoint, I give my students some quiet time to think about their own hat design. During this time, they begin forming an idea of what their hat will look like - its theme, colours, and decorations.
Once they have an idea, they turn to a partner and describe their ideal hat. I encourage them to explain all the little details and listen carefully to their partner’s ideas.
Sharing their design verbally helps them organise their thoughts and clarify their vision before they begin planning.
Important Refining Ideas with Key Questions
To help students make sure their design is both creative and practical, I have them consider these three key questions during their discussions:
Will you be able to wear and walk around in this hat?(Is it stable, comfortable, and balanced? Will it stay on your head?)
Can we find or make the materials needed? (Are the decorations achievable with classroom supplies?)
Will you be able to make this hat mostly on your own? (Does the design allow for independent construction?)
This step prevents unrealistic ideas from becoming frustrating challenges later on, while still encouraging big, bold, and creative thinking.
Once students have refined their ideas, they’re ready to move on to Step 2: Planning Their Easter Hat Design, where they will sketch their ideas and choose materials!
Step 2: Planning the Easter Hat Design
Once students have brainstormed and refined their ideas, it's time to put those ideas onto paper!
Planning their design before construction helps ensure that their hat is practical, achievable, and well thought out.
Sketching the Easter Hat Idea
Each student receives an Easter Hat Planning Sheet, where they draw a detailed picture of their hat. I encourage them to include as many details as possible - the more specific their drawing, the easier it will be to bring their hat to life later.
✔ Colouring is important! Students use the exact colours they plan to use on their final hat. This helps them visualise how it will look and ensures they think about every part of their design before they start building.
✔ Adding materials - As they sketch, students also list the materials they think they'll need, from hat bases and decorations to glue, tape, or ribbons to hold everything together.
One-on-One Teacher Check-Ins
While students are working on their sketches and plans, I move around the room and talk to each child about their design.
This is an important step because it allows me to:
Discuss the practicalities of their design – Will the hat stay on their head? Is it too heavy?
Help students problem-solve any challenges – If a student has a complicated idea, we talk about ways to simplify it while keeping the essence of their vision.
Confirm the size, shape, and materials needed – I take note of what each child will need so that I can organise supplies efficiently.
There’s a designated space on their planning sheet where I list their required materials, which makes it easy to prepare for the next stage.
Creating a Shopping & Materials List
At the end of the day, I collect all of the students' planning sheets and use them to create a class shopping list before I head off to the discount craft store after school. This helps me:
Check what materials we already have in the classroom
Plan what needs to be gathered or purchased
Ensure every child has what they need for their design
Want to make planning easier for your students?
Grab my FREE Easter Hat Planning Template from my Resource Library!
You can download the Easter Hat planning sheet we use from my Free Resource Library HERE.

This printable helps students organise their ideas, sketch their design, and list materials in one place. Download my Easter hat planning sheet here!
Step 3: Gathering Materials & Setting Up the Classroom
Once students have finalised their hat designs and listed their materials, it’s time for you to gather supplies and set up the classroom for smooth and independent hat-making.
A little preparation goes a long way in ensuring the construction process is organised, efficient, and (relatively) mess-free!
Easter Hat Materials to Consider
Having a variety of materials available allows students to be creative while ensuring that their hats are sturdy and wearable. I gather materials based on students' planning sheets, but I also like to have some extra supplies on hand in case they need to adjust their designs.
Basic Hat Bases (The foundation of the hat)
Headbands
Paper plates or bowls
Party hats
Strips of cardboard to form a hat band
Recycled boxes
Templates - ear shapes, flowers, chicks, ebbs and baskets
Decorative Items (For creative flair and a pop of colour!)
Pom-poms, pipe cleaners, and googly eyes
Crepe paper, tissue paper, and cellophane
Feathers, fabric scraps, and ribbons
Artificial, felt and tissue paper flowers
Easter stickers, foam cutouts, and sequins
Coloured paper, felt, and cotton wool
Recycled Materials (Encouraging sustainability)
Cardboard rolls and egg cartons
Bottle caps, straws, and buttons
Scraps of wrapping paper and old greeting cards
Having a good mix of structured materials (pre-cut shapes, ready-to-use bases) and open-ended materials (scrap fabric, ribbons, and natural items) allows students to make their hats truly unique.
Also consider a range of options for attaching your decorative items - sticky tape, glue dots, glue sticks, PVA glue and your best friend - a hot glue gun!
Setting Up an Easter Hat Construction Station
A well-organised classroom setup makes the hat-making process smoother and less chaotic.
I create designated areas for students to work independently while keeping the space manageable for everyone - both students and teachers.
Organised Supply Stations
I group materials into categories (hat bases, decorations, adhesives) so students can easily find what they need.
Materials are placed in baskets, a craft box or in trays to encourage tidiness and easy access.
Have A "Mess Zone" for Glue & Paint
Liquid glue, paint, and glitter are contained in one area to prevent them from spreading all over the classroom.
I lay down newspaper or a plastic tablecloth to catch spills and make cleanup easier.
A Hot Glue Gun Station (Teacher-Supervised of course)
Some materials (like fabric, foam, or heavier decorations) require hot glue for stronger adhesion. PVA glue is great but it takes ages to dry.
I set up a dedicated station where I handle the hot glue gun while students bring their hats to me or our teacher aide (or a parent helper) for any tricky parts.
With materials sorted, stations set up, and students ready, it’s time to start making their Easter hats!
Let the fun begin!!
Step 4: Making the Easter Hats!
With all the materials gathered and the classroom set up, it’s time for the most exciting part - bringing the students’ designs to life!
This stage is always filled with creativity, excitement, and a bit of managed chaos, but with the right approach, it can be a smooth and enjoyable experience for everyone.
Time Management Tips
Hat-making can take just over a week, depending on how much time is available each day. To keep things manageable, I structure the process over multiple days and ensure that all students get time to work on their creations.
Spread hat-making over several days
We don’t try to complete hats in one sitting! Breaking it up into smaller sessions allows students to focus on different parts of their design without rushing.
Some days we focus on constructing the hat base, while other days are dedicated to decorating and adding final touches.
Rotate small groups through the construction area
Sometimes, instead of having the whole class working at once, I rotate small groups through an Easter Hat Making Investigation Area. This keeps the space less crowded and more organised while allowing me to give my students a little help if they need it.
Easter hat making could be one rotation in our literacy group rotations. While one group is constructing their hats, other students might be engaged in independent activities like writing about Easter-themed topics or reading Easter-themed books.
I also have the Easter Hat Making Investigation Area available during our regular play based learning investigations session.
Managing Changes in Plans
Nearly every year, there are a few children who see new materials or a friend’s creative idea and suddenly want to change their entire design!
While I encourage flexibility, I also want to ensure fairness and efficiency in the process.
Allow flexibility—but with limits
If a student wants to add extra decorations that weren’t part of their original plan, I ask them to wait until all hats are complete. This ensures that everyone gets the materials they originally planned for before any extra supplies are used.
Sometimes students get to use the leftover materials, sometimes they miss out, and sometimes they forget about their change of mind altogether by the time comes around!
Encourage problem-solving
If a student runs into a challenge (e.g. their hat is too top-heavy or decorations aren’t sticking), I guide them to think of solutions rather than just fixing it for them.
They might need to adjust their design, swap out materials, or reinforce parts of their hat. These situations are great opportunities to practice problem-solving and resilience!
By the end of the week, every hat is complete, and we are all feeling the excitement of the upcoming parade.
Sometimes it’s a mad rush to finish the final touches the day before, but no matter what, the students beam with pride as they get ready to show off their one-of-a-kind Easter hats!
Step 5: The Easter Hat Parade – A Day of Celebration!
After weeks of planning, creating, and problem-solving, the Easter celebration is finally here! This is the moment when students get to proudly showcase their one-of-a-kind creations to an excited audience of parents, teachers, and peers.
The atmosphere is always full of excitement, clapping, and happy faces. The kids have such a great time!
It is such a memorable way to celebrate the end of Term 1 and a wonderful way to start the Easter holidays.
Building Excitement Leading Up to the Big Day
In the days before the parade, we build anticipation by:
Hosting a “hat reveal” session. Students take turns sharing their hats with the class, explaining what inspired their design and how they made it.
Setting up a photo booth – This is so much fun! We take individual and group photos of students in their new hats before the big day, which they love!
Counting down to the parade – Each day, we talk about the upcoming event on our class calendar. We count down the days and discuss what to expect, so students feel prepared and excited rather than nervous.
Practising our Easter songs – If we’re singing as part of the parade, we spend a few minutes each day reviewing the lyrics and actions so students feel confident performing.
Organising the Parade
A well-organised parade ensures that everything runs smoothly and that students (and teachers!) can fully enjoy the experience. We are so lucky that our Music Specialist Teacher organises our Easter hat Parade but if you aren’t so lucky, here are a few key things to consider when planning the event:
Where will students walk?
We usually walk around the hall, following a set path so that every student gets a chance to be seen by the audience.
If the weather is nice, an outdoor parade can be a fun alternative!
Where will parents and families sit?
Families usually sit around the edge of the hall or in designated seating areas so they have a great view.
We make sure there is enough space for all students to move freely without feeling overwhelmed by the crowd.
Will students perform a song?
After the parade, our students gather on stage or in front of the audience to perform a few well-rehearsed Easter songs, complete with actions of course.
This is always a crowd favourite, and the children love singing and waving to their families!
Encouraging Student Confidence
For many students, the Easter Parade is their first time performing or presenting something in front of a large audience.
To help them feel confident and proud of their work, we:
Talk about the joy of sharing their creations – We remind students that their hats are special because they made them themselves and that everyone will be excited to see their hard work.
Practise walking with their hats – A few days before the parade, we do a mini practice run so students can get used to wearing their hats while walking and doing the actions to the Easter songs. This helps them feel comfortable and confident before the big day and gives us a chance to make any last-minute adjustments if their hat is wobbly or uncomfortable.
Celebrate everyone’s efforts – We encourage a positive and supportive atmosphere, where students cheer for their classmates and recognise that every hat is unique and special.
The Easter Hat Parade is always a beautiful way to end the term, with beaming smiles, proud students, and delighted families.
After all their hard work and creativity, the students leave feeling accomplished and celebrated and usually already dreaming about what they’ll make next year!
Looking for more Easter Classroom Ideas?
I have a blog post on our Easter themed Math investigation areas to help you set up some engaging and purposeful Easter-themed learning opportunities in your classroom.
Click HERE to read the Easter Math Ideas For Play Based Learning Blog Post.

I also have an Easter Activities Pinterest board you might like to follow. On this board I pin fun classroom Easter activities for kindergarten, preschool and first grade.

Easy Easter Hat Ideas for the Classroom
If you're looking for simple and achievable Easter hat ideas that are fun for students to create, here are some easy options from my FREE PowerPoint that require minimal prep and basic craft supplies.
These ideas allow for student creativity while keeping the process manageable in a classroom setting.
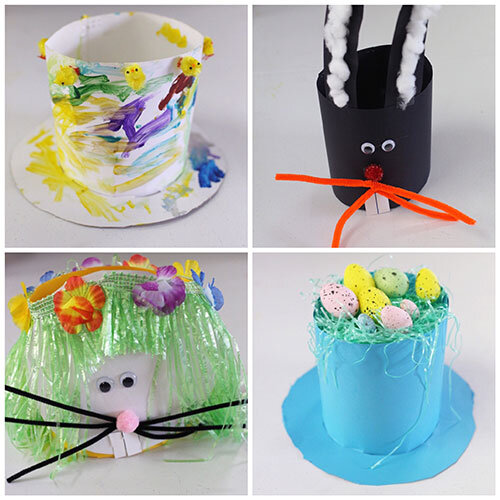
🐰 Easter Bunny Ear Headbands
A quick and easy option! Students cut out bunny ears from cardstock or felt, attach them to a headband or a strip of cardboard, and decorate with cotton balls or pom poms. (cotton wool balls are HEAPS cheaper and go a long way)
🐣 Baby Chicks in a Nest Hats
Using a paper plate as the base, students glue on shredded green tissue paper or raffia to resemble a bird’s nest. Add mini plastic eggs or foam eggs, little chicks (made from felt, card, pom poms or purchased ready made), and feathers to complete the look.
🌸 Spring Garden Hats
This is another easy idea and perfect for a nature-inspired look! Students decorate an old straw hat (or any wide-brimmed hat really) or a simple cardboard crown with paper flowers, leaves, butterflies, and bees made from craft materials.
📦 Recycled Box Hats
Encourage sustainability by having students decorate small cardboard boxes to wear as hats! They can turn them into Easter baskets, gift boxes, or creative Easter-themed designs using paint, stickers, and recycled materials.
Free Easter Hat Planning Resources for Teachers
Planning an Easter Hat Parade in the classroom doesn’t have to be overwhelming!
With the right structure, materials, and resources, you can make the process fun, engaging, and stress-free for both you and your students.
To help you get started, don’t forget to download your two free resources!
They will make Easter hat planning a breeze!!
FREE Easter Hat Inspiration PowerPoint – Packed with 36 slides of creative hat ideas, this PowerPoint will help spark your students’ creativity and get them excited about designing their own hats.
FREE Easter Hat Planning Template – A simple student-friendly worksheet where children can sketch their hat design, choose colours, and list materials before they start constructing.
If you are looking for some engaging Easter Worksheets to keep your students on task and learning while you help some of your other children with their Easter hats, you might be interested in these fun Easter worksheets.
They are perfect to keep your kids learning during all the exciting Easter craziness. Check out these 32 Easter Math Worksheets - your class will LOVE them!

Make Easter Math Easy & Fun with No-Prep Printables
Easter is an exciting time in the classroom, but keeping your students engaged AND still covering all those essential math skills can be a challenge... especially when you’re exhausted at the end of Term 1.
With these fun Easter worksheets, you’ll have print-and-go activities that are zero prep, stress-free, and super educational.
Say goodbye to wasted time searching for meaningful resources and enjoy some purposeful Easter-themed learning fun!
Perfect for busy teachers who need low-prep Easter math activities that actually teach and revise important concepts.
These Easter printables for kindergarten help you celebrate the season while keeping students focused and learning.
Save Time and Keep the Learning on Track
You don’t have time for complicated lesson plans or last-minute prep at this time of year!
These no-prep Easter math worksheets make your life a whole lot easier by:
Saving time – Just print and go with these no prep activities! No cutting, laminating, or extra materials needed.
Providing a fun way to reinforce number concepts, sorting, patterning, and all your term 1 math learning.
Keeping students engaged with Easter eggs, Easter bunnies, and math challenges.
Offering flexibility – Use for whole-class instruction, math centers, early finishers, or homework.
Helping younger children feel successful with a mix of hands-on activities, fine motor skills practice, and independent work.
These printable worksheets will help you feel prepared and organised, so you can focus on teaching instead of planning and prep.
The Best No-Prep Easter Activity for Engagement
Teachers love these Easter Math Worksheets for Kindergarten because they provide:
⭐ Instant learning with no setup – Just print and use.
⭐ Versatility – Great for whole-class work, small groups, or independent practice.
⭐ Educational value – More than just cute Easter themes - these build and revise real math skills.
Young children stay engaged because they love the fun Easter activities (like an Easter egg number hunt, colourful eggs for patterning, and bunny-themed counting games).
The Easter printables for kindergarten in this pack instantly provide meaningful learning while reducing prep time, so you can enjoy this Easter season without all the stress.
These Easter Themed Worksheets for Kindergarten Contain:
2 Printable Title Cover Pages - So you can turn the worksheets into Easter Books. Versions to make both an Easter Maths Book and an Easter Number Book
2 Patterning Worksheets - Continue and create AB, AAB & ABC patterns
2 Sorting Worksheets - Sort by size and by colour
Long & Short Worksheet - Using direct comparison
Days of the Week Cut and Paste Activity Worksheet - Trace the names, cut and paste in order
2 Data Collection Worksheets - Yes/no questions and data collection on the Easter bunny and chocolate eggs
Colour by Shape Easter Basket Worksheet - With rectangles, triangles, circles, squares, ovals, pentagons and hexagons
2D Shape Drawing Worksheet - Draw creative Easter themed pictures using a circle and a square. So much fun!
Subitising & Matching Numbers to 10 Worksheet - A fun easter egg cut and paste avtivity.
Find & Count Hidden Pictures to 10 Worksheet - For numbers up to 10.
3 Colouring to Ten Worksheets - In this Easter math activity, students colour the Easter pictures in ten frames.
3 Easter Dot-to-Dots Worksheets - Joining the dots from 1 to 9 and 1 to 10.
Missing Numbers to 10 Worksheets - Students write in the missing numbers on Easter bunnies and Easter eggs.
2 Number Mazes - Students order numbers to 10 to find their way through the maze.
Colour by Number Worksheet - Featuring numbers 3 to 8.
Ordering Numbers to 10 Worksheet - Students cut and paste the numbered Easter bunnies.
10 Worksheets for Number Representation – Students represent the Numbers 1-10 in numerals, words and on a ten frame and a numberline. Each Number has its own worksheet page to equal pages of fun!
Full of heaps of various activities and creative ideas your kindergarten kids will LOVE!
How to Use These Fun Easter Worksheets for Kindergarten
My Easter math printables are perfect for:
Whole-class revision activities – Reinforce learning in a fun way before the Easter break.
Math center activities – Perfect for hands-on learning and skill-building.
Early finishers – Keep students engaged with easy no-prep Easter activities.
Morning work or independent practice – A fun start to the day.
Homework or take-home packs – Support learning at home with easy-to-follow printables.
Math Intervention groups – Provides fun activities and extra practice in a low-pressure setting.
Wet weather or last-minute lesson plans – When you need something quick and effective!
This ready-to-go set of 32 Easter-themed worksheets (in a pdf file) are a great way to engage your students while keeping them on-task and learning right up until the Easter break.
Just print and watch your students stay focused, excited, and learning - without any extra work for you.
Easily Celebrate Easter AND Keep the Learning Happening
With these fun Easter worksheets, you can instantly provide fun AND educational activities to your kindergarten students! Without the stress of prepping heaps of new materials. 🙌
Download your Easter Math Printables now and make your end-of-term a breeze!
If you like this blog post on Easter hats and it has helped you get some ideas and inspiration for making Easter hats in your classroom this year, please consider sharing it...
Just CLICK the sharing box below.👇